
The Live Snap Love Blog
YOUR SPOT FOR PHOTOGRAPHY TUTORIALS, TECHNIQUES, INSPIRATION AND MOTIVATION!

What Is Lens Compression? And What does it do?!
When we choose a lens to take an image with, most of the time we are looking at how much we want to fit into the frame, and far away from our subject we are. For example, if you are shooting indoors in a small room, but you want to leave in some of the surroundings to give the image context, then you are going to want to choose a shorter focal length. If you are photographing something farther away, like your child at sports day, you are going to want to have a longer length lens on your camera, so you can be farther back but still have the whole of your child in the frame. In the post I did yesterday, you can see just how much more you can fit into the frame with a 35mm than a 200mm. (Check out the post on focal length comparisons if you missed it!)
As I mentioned in that post, there is another reason for using certain lenses over and above how near or far we are from our subjects, and that is the lens compression.

Focal Length Comparison
I finally got around to photographing focal length comparisons again this week - I know these can be really helpful as a reference point.
I gave up on trying to get someone to model for me - since one certain little boy wouldn't stay in the same place for long enough whilst I went through all my lenses (twice!) we have the lovely Dave as our model instead. I'm pretty fond of Dave, he's very obliging :)
So, each of these photos has been taken with a different lens, and therefore a different focal length, so you can see how your field of view changes with each one. For this first set I'm sitting in the same location for each shot, just changing my lens to get the different focal lengths. (If you are wondering which lens were used you can check out the lenses here)

How to Reduce Noise in Photos
Today, some tips for how to reduce noise in photos, both in camera, and in processing....
When shooting in low light conditions, we generally have to compensate for the lack of light in the scene by bumping up our ISO setting. This is great as it allows it to shoot without using flash, but the problem with using these high ISO's numbers is that it can introduce noise to your images - the stuff that looks like grain or speckles. This puts a lot of people off shooting with high ISO's, but there are a couple of things you can do to minimise the noise and get the best images in low light.

How to Care for your DSLR & Lenses
After investing all that money on your amazing new camera and lenses, it makes sense to spend a little time on DSLR maintenance to make sure that they stay in tip top condition. This is mainly so that you continue to get the best image quality and extend the life of your equipment, but it also helps should you want to sell on some of your equipment at any time. I've sold a couple of lenses now and I've gotten a pretty good price for them: lenses in particular hold their value well if you look after them. I have a bit of a routine that I have with cleaning and maintaining - this is what I do....
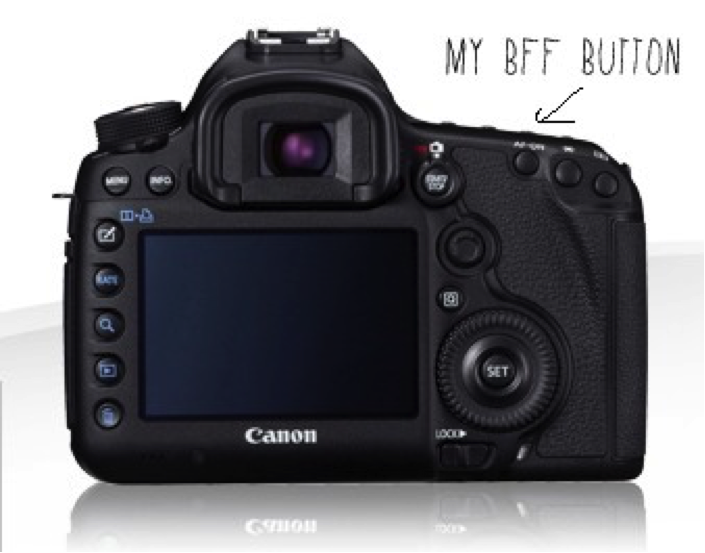
A Guide to Back Button Focus
If you find yourself struggling to get tack sharp photos of moving subjects, then i have a little tip for you here today that might just help!
It's called back button focus - and it's another way of focusing that is particularly good for action shots.
Now, I have to warn you ,it's pretty confusing to begin with, and you will probably hate it at first. I also don't recommend this until you are comfortable with focus in general, just because it can be too many things to think about at once! But if you are a bit more experienced, you might want to give this a go.
Here's the lowdown on back button focus.

6 Ways to Shoot in Cluttered Locations
Whilst my home isn't exactly an rubbish tip, it's a normal family home with lots of clutter from day to day life. Many times I find myself wishing I had a home that was a bit more camera friendly (imagine, large windows, white walls, crisp clean furniture, with no lego pieces in sight and no drawing on the walls....) but you just have to learn to work with what you've got! Although for sure I sometimes love to incorporate our usual home life into my images - when I'm documenting - for other image types I usually crave simplicity, so I try to find areas that give me that "clean" uncluttered look.
The best way to show you that is to show you some images, and pullbacks on where I have taken them.

Being Ready to Capture Everyday Moments
Even before I started a Project 365, most days I would pick up my camera – not necessarily to get a great shot, but simply to snap the candid moments that happened throughout the day. I've lost count of the number of times I missed a "kodak moment" because I was either fumbling with my settings, trying to find a memory card, or wondering where the heck I'd left my camera bag!
That's why I now have a little bit of a system in place that helps me be prepared and ready to capture anything that pops up. Once you get into the groove of doing this, you'll find that you can quickly pick up your camera and snap away at any time!

How to use Triangles for Photography Composition
One way to make your compositions more interesting is to try to create triangles within your composition - they help divide the frame, guide the eye, and just add visual interest. Although it sounds hard, these are actually very easy to find once you remember to look for them!
Here are some examples:

How to Use a Gray Card
I've spoken before about using a grey card to either set your white balance or exposure, and today I thought I'd go one step further and explain the steps you take to do that! First off, a gray card is just a piece of card that represents 18% gray - in other words the middle gray that your camera tries to expose for (See this post on understanding your light meter for more information on that) Before I got my Expodisc, I used this one - CPM Delta 1 8 inch x 10 inch Gray Card which costs around $10 - but you can get lots of different ones which are pretty inexpensive. (I don't have it but this Pocket-sized one looks good for being a bit more portable). It doesn't really matter which one you choose, as long as they are non-reflective.

10 Tips for a Portrait Close Up
I love a simple classic portrait shot from time to time - having your subjects face as the centre of attention allows to really concentrate on their features and expressions, and can feel much more intimate than other portrait types.
And since it's been a while since I've done one, here's a classic "10 tips" post on them for you!
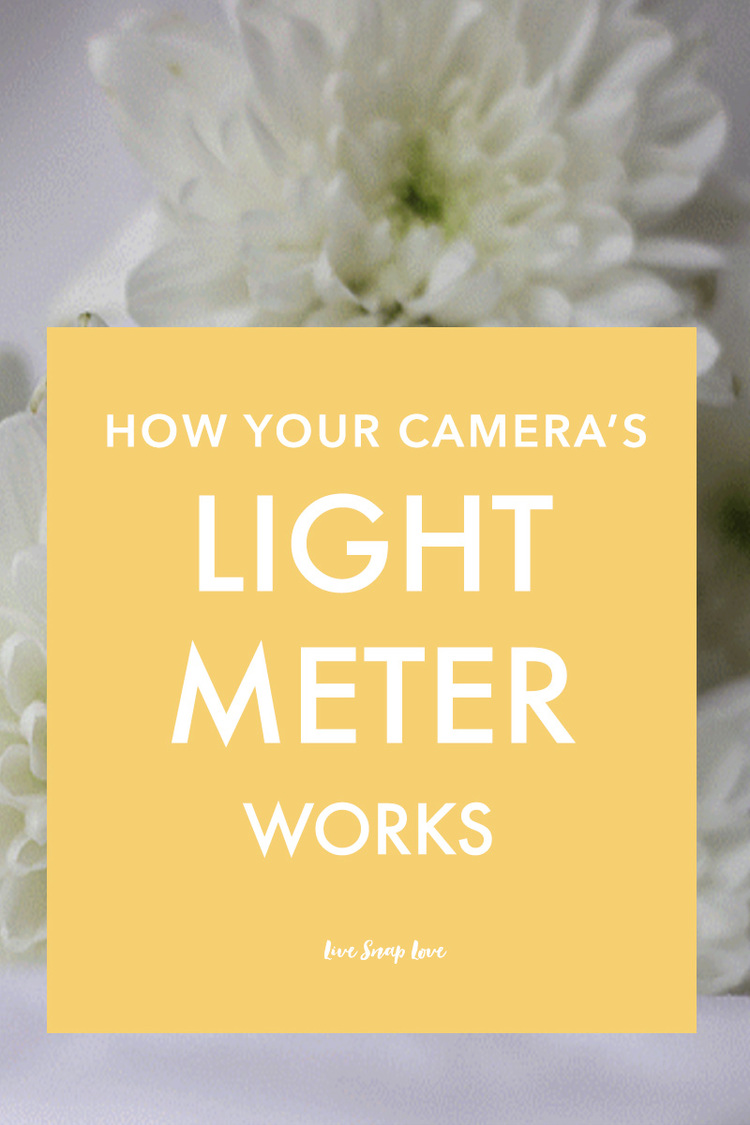
How Your Camera's Light Meter Works
When you are shooting in Manual Mode (or any other mode for that matter) you are probably using your camera's in-built light meter to "read" the light available in the scene and tell you when you have reached the correct exposure. When the little bar on your meter is at 0, that is your camera telling you that your image will be correctly exposed....in theory at least. However, sometimes, our camera's light meter can get it wrong. Here's why, and how to deal with it:

How To Get Perfect Exposure Using Spot Metering and the Zone System
Having problems getting your exposure spot on? Then I have got the tutorial for you! We are going take a look at how we can combine the awesomeness of spot metering, with the simplicity of something called the Zone System. This system was developed by a very famous black and white film photographer called Ansel Adams, who devised it as a way of determining the perfect exposure in camera for any given scene. Although this was created for black and white film users, we can steal it for use in color and digital photography too!
Enough history: Let's get crackin' with the tutorial!

Fake a Black Background: Introducing the Inverse Square Law
This is guest post from a couple of years ago that i've moved over from the old blog - so if you are are a long-time follower you may have read this before but it was such a good tutorial I had to share it again! If you have ever wondered how you can get a black background without a backdrop (or just need reminding!), then this is the post for you. Over to my good friend and wonderful photographer, Jan, to share how this is done....
First of all, thank you Audrey for having me back. Don’t you all just love Audrey’s blog? I think she can explain things more precisely than anyone else out there. She’s amazing!

10 Ways to Improve your Photography This Weekend
No matter where we are in our photography journey, I'm willing to bet that there are always to improve what we do or how we do it. Although everyone reading this will be at different stages along the road, and even on different paths, I hope that reading this post gives you some ideas of the areas you can work on this weekend regardless of where you are or what you do...

Photography Composition: Using the Rule of Thirds
The rule of thirds is one of the most basic principles of composition in photography, and one you will use all the time going forward! Here's how to do it:
What you need to do is imagine that your photograph is divided into nine equal sections by two horizontal and two vertical lines (as shown below) Apparently, when we look at something, our eyes are naturally drawn to the points where these lines intersect. Placing a point of interest on one of these intersections, or placing elements along one of the lines, gives the photo more balance and is more appealing to the viewer.