
If you’ve ever wondered how to use an ExpoDisc, you’re in the right place!
Whether you’re struggling with yellow skin tones, photos that look too blue, or colours that never quite match what you saw with your own eyes, learning how to set a custom white balance can make a huge difference.
In this guide, I'll show you exactly how to use an ExpoDisc, explain why it's one of my favourite photography tools, and walk you through the simple process I use before every portrait session.

Why I Started Using an ExpoDisc
For years, I’d spend ages in Lightroom trying to fix skin tones that looked too warm, too cool, or just… off.
And as someone relatively new to photography, I wasn’t really sure what I was looking for, and what needed to be adjusted.
So not only did my photos never look quite right, I wasted a lot of time in editing too!
Then I discovered the ExpoDisc.
It’s one of those photography tools that doesn’t get talked about nearly enough, but it’s made a massive difference to both my editing workflow and the consistency of my colours.
I've now used an ExpoDisc for about 10 years, mainly when photographing portraits, and it's become one of the first things I do before almost every portrait session.
But what is it and how do you use it?
(Psst! If you’d rather watch than read, here’s a video walkthrough showing exactly how I use an ExpoDisc. Or keep reading below for my complete guide, including when to use one, who it’s for, and why it’s become one of my favourite photography tools!)
What Is an ExpoDisc?
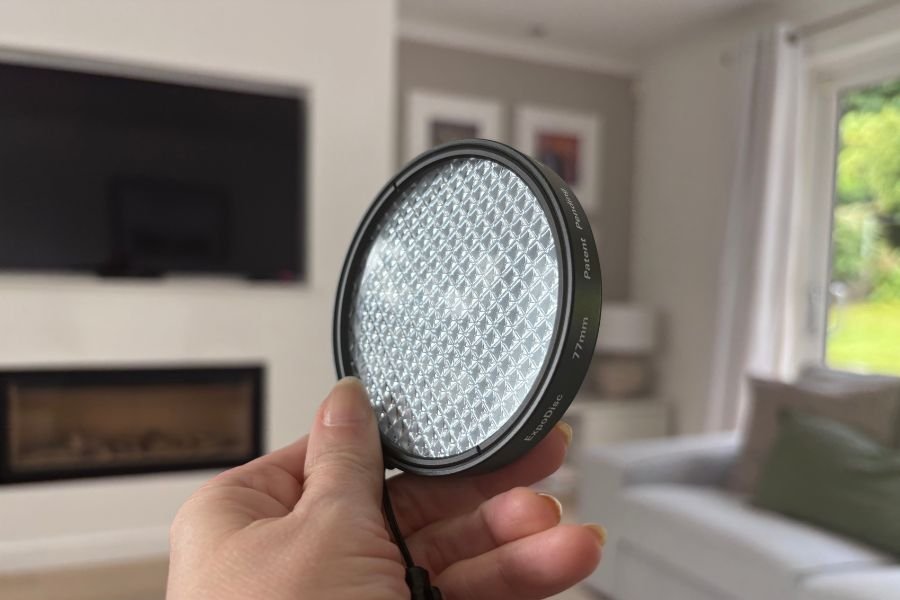
An ExpoDisc is a photography white balance tool that fits over the front of your camera lens and helps you set a custom white balance before you start shooting.
Instead of photographing a grey card or trying to guess the correct white balance later in editing, the ExpoDisc lets your camera measure the actual colour of the light falling onto your subject.
That means your camera creates a custom white balance that’s tailored specifically to the lighting conditions you’re shooting in.
The result?
Colours that are much more accurate straight out of camera! 🥳
(And for many of us, most importantly, natural-looking skin tones 😅)
If you don’t already have an Expodisc, you can grab one on Amazon (that’s my Amazon affiliate link btw) then read on to see how to set a custom white balance using an expodisc.
So, Why Is White Balance So Important?
White balance controls how your camera records colour. When it’s correct, whites appear white, skin tones look natural, and the colours in your photographs closely match what you saw with your own eyes!
When white balance is wrong, photos can look too orange, too blue, too green, or too magenta. (Like you can see in the example below!)
While this can usually be corrected during editing, getting it right in-camera saves time and gives you a much more consistent set of images to work with.

That’s exactly where an ExpoDisc comes in!
It helps your camera measure the colour of the available light so you can create a custom white balance that’s accurate for the conditions you’re shooting in.
How to Use an ExpoDisc
Using an Expodisc is easy, but you do need to make sure you are doing this from the right position!
Step One: Place the expodisc in front of your lens
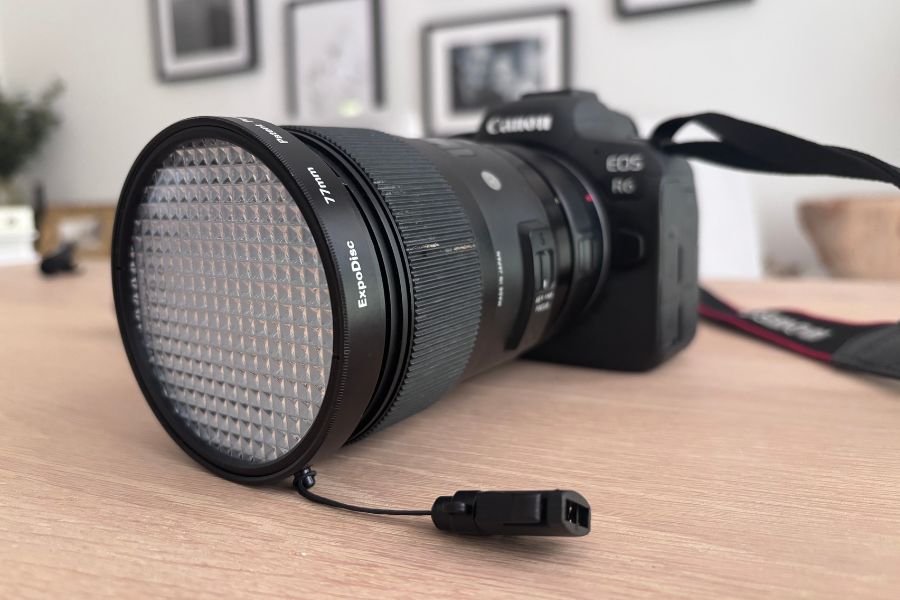
The very first step is just to place the expodisc in front of your lens.
Now if you happen to have a lens that is the same thread size as your expodisc, that's great, you can just clip the Expodisc onto the front of the lens so you don’t have to hold it in place.
However, if you are using a lens that has a different thread size, don’t worry, all you need to do is place the expodisc in front of the lens and hold it in place - as long as that Expodisc is covering the entire lens, you're good to go!
Step Two: Go to where your subject is
This is the important part!
The ExpoDisc measures the light falling onto your subject, not the light where you’re standing.
So move to where your subject will be positioned.
With your expodisc in front of your lens, point your camera back at the area where you're going to be taking the photo from.

Step Three: Set your aperture, shutter speed and ISO
Now set your aperture, your shutter speed, and your ISO in order to get the correct exposure.
At this point you're just trying to get your ticker to zero so you're setting all three of those - ideally in manual mode - in order to get the correct exposure.
(Not sure which settings you should be using? Panic not - I have something for you! It's my free manual cheat sheetand that's going to give you some ideas about the aperture, shutter speed and ISO you should be using!)
Step Four: Snap a picture!
Now snap the shutter to take a picture. (If you find that your camera won't do that, just switch that little switch on the side of your lens from AF to MF and that will allow you to take an image)
You will end up with an image that just looks grey.
Step Five: Set your white balance to custom
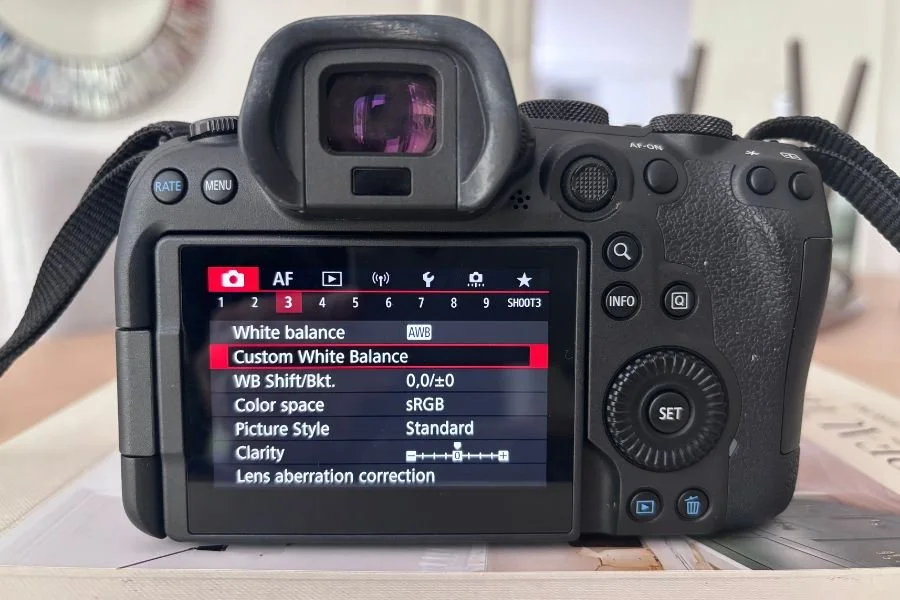
So now you're going to go into your camera settings (which will be different depending on whether you shoot Canon or Nikon etc) and find your white balance menu.
Choose Custom White Balance and select the image that you just took with the Expodisc!
Now you can go back to your shooting position and take your photos, knowing that you have your white balance perfectly set!
It sounds a bit long-winded written out, but honestly, takes around 30 seconds to do once you have found your custom white balance settings etc.
Who Should Use an ExpoDisc?
I think it’s particularly useful if you:
• Photograph people regularly.
• Want natural-looking skin tones.
• Shoot in changing outdoor light.
• Want to spend less time editing.
• Care about colour consistency across an entire gallery.
So If you’re photographing weddings, families, children, portraits, or even products, it’s a brilliant investment.
(If you shoot landscapes, I personally wouldn’t bother as you will often change the white balance AWAY from the correct colour for artistic reasons, so it’s not as crucial as with people photos)
And you’re still learning white balance in photography, an ExpoDisc can also be a brilliant teaching tool because it helps you understand how different lighting conditions affect colour - and helps you to train your eye to see what accurate white balance looks like.
So….Do You Need an ExpoDisc?
Nope!
You can absolutely create beautiful images without one, or you can use a different tool, even a different method, and many photographers simply adjust white balance in Lightroom / Lightroom Classic afterwards.
But if you’re constantly finding yourself fighting yellow skin, blue shadows, or inconsistent colour, an ExpoDisc removes so much of that guesswork and just makes your life easier.
If you want to get one, you can get one on Amazon (if it shows an option, get the largest size - 82mm - that way it will fit over every lens you own now, or in the future!)
Or learn more about the Expodisc from the makers themselves!
Next Steps…
Setting a custom white balance is one of the easiest ways to improve your colour—but it's only one part of getting consistently beautiful photos.
Once you understand aperture, shutter speed, ISO, and how to shoot in manual mode, you'll be able to take complete control of your camera instead of letting it make decisions for you.
In fact, the MORE information you can give your camera, the better the final results will be.
If you’re tired of second-guessing every little thing, do make sure to check out Auto to Awesome!
Auto to Awesome is a comprehensive, ridiculously easy to follow 6- part program that gives you a complete FRAMEWORK to follow that will turn your images from boring, middle of the road snapshots, into wall worthy, professional level images!
We go over everything: from which camera settings to use, to how to shoot in manual mode, how to use light and composition effectively, and the steps for getting tack sharp focus (yes, even with erratic toddlers or flighty birds!) and accurate colour.
This course takes you by the hand and walks you through it ALL, step by step and setting by setting, so that this truly is the only photography course you'll need to start getting photos you love.
If you want the way you take photos to feel more creative and intentional, this is what you need! 😉
Frequently Asked Questions
Can I use an ExpoDisc with any camera?
Yes! As long as your camera allows you to set a custom white balance, you can use an ExpoDisc. The exact menu options vary between Canon, Nikon, Sony, Fujifilm and other brands, but the overall process is very similar.
Does an ExpoDisc work for shooting in RAW?
Yes. Even though RAW files allow you to change the white balance later, setting an accurate custom white balance in-camera gives you a much better starting point and makes editing faster and more consistent.
Can I use an ExpoDisc indoors?
Absolutely! In fact, mixed indoor lighting is one of the situations where an ExpoDisc can be most helpful, as it accurately measures the colour of the available light.
Do I need to reset my ExpoDisc every time I move?
Only when the light changes significantly. If you move from open shade into direct sunlight, or from outdoors to indoors, it’s worth taking a new reading.
Is an ExpoDisc better than a grey card?
Both are great! A grey card requires you to photograph it and adjust white balance later (or use it as a custom reference), while an ExpoDisc allows your camera to set a custom white balance before you start shooting. Many photographers find the ExpoDisc quicker and more convenient.
Can beginners use an ExpoDisc?
Definitely. Although it sounds technical, using an ExpoDisc only takes about a minute and quickly becomes part of your shooting routine.
Want to learn more camera settings?
If you're learning photography, these guides will help you:
Why Your Photos Are Always Too Dark (And how to fix it)
10 Tips for Using A Canon 50mm F1.8 Lens