How To Use The Curves Tool in Photoshop
The Curves Tool must be one of the most versatile tools in Photoshop, and you can do so much with it! It's also looks seriously scary with all those grids, lines, and points - so much so that many people shy away from using it. That is all going to change today my friend! You and I are going for a little walk through the curves tool, and finding out some of the things we can do with it.

What is the Curves Tool?
It's a tool in Photoshop that allows you to adjust the tonal contrast of an image: so, your blacks, shadows, midtones, highlights and whites. You can also manipulate the color tones of the image with this tool too, but that's a lesson for another day - for now, we are going to stick with using it just to manipulate the overall tones, not individual colors.
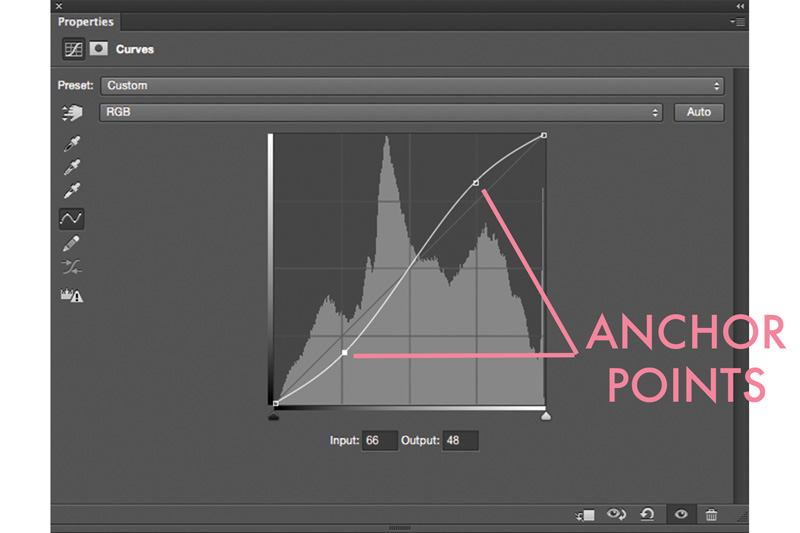
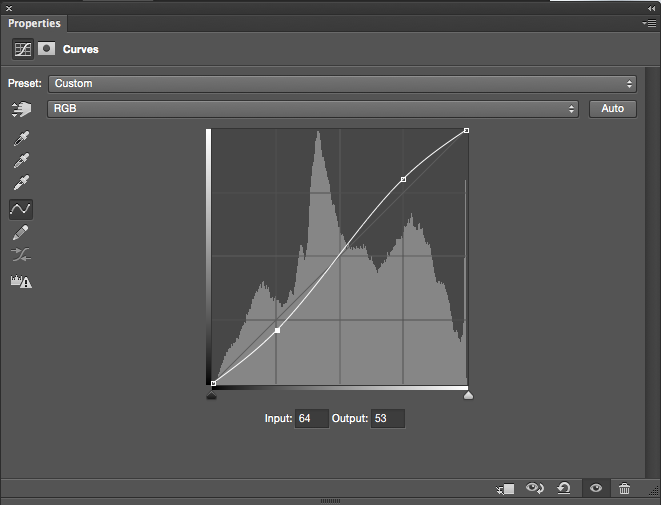
When you first open up a Curves adjustment layer you will see a straight diagonal line running across the graph like in the image. When you pull this line to manipulate the tone, you will create a curve - hence the name curves!
The top right of the line represents the light tones (highlights and whites) and the bottom left is the dark tones, so your shadows and blacks, with the midtones right there in the middle.

Clicking anywhere along this diagonal line will create what is called an anchor point, and you can have several anchor points along this line.
Now that we have a bit of a grounding on the curves tool, let's look at a few ways we can use it!
Using the Curve Tool to Adjust Contrast
Let's start by learning how to use the Curves Tool to adjust the Contrast in our image.
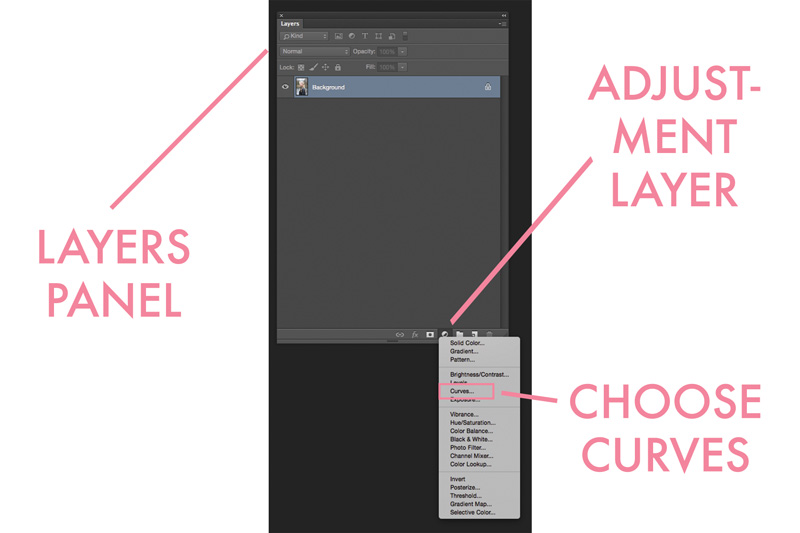
First, bring up the curves tool as a adjustment layer. Go to the Adjustment Layer Icon at the base of the Layers Panel and choose Curves.
The first thing we are going to do is create a simple S curve, which will allow us to add contrast. In essence, this brightens the light tones and darkens the dark tones, giving the image more "pop". The amount of contrast needed will be different for each image - and of course your own personal taste - so adjust further up or down as necessary.
Create an S curve like one below by creating two anchor points, and moving the top one up slightly, and the bottom one down slightly, creating a "s" shape, like so:
That will give you quite an aggressive amount of contrast (I wanted to be sure you could see the curve!) so adjust to taste, even bringing the points to just above and below the diagonal line like in the image, which will tone down the contrast.

(Pssst! if you’re ready to get more amazing images using Photoshop, be sure to download my FREE Photoshop Starter Kit which will give everything you need to take your first editing steps with Photoshop - including some of my fave actions. GO HERE TO GRAB IT!

If you want to de-contrast something, simply move the points the other way, in a sort of reverse S shape.

This is a simple manipulation of the curves layer to add contrast, but you do a bit more. The easiest way to get a feel for this is to see some of the variants you can do. To do this, click on the button that says 'presets" on the top left of the dialogue box, and a list of curves presets with drop down - try "increase contrast" or "medium contrast". You'll see that the S curve changes a bit (but still in essence a S curve) and therefore gives you a slightly different look.

Using the Curves Tool To Brighten or Darken Images
Almost too easy!
You can brighten the overall image just by clicking in the midpoint and dragging the line up, or , if you want to darken the overall image, clicking the middle and dragging it down.


Using the Curves Tool to Add a Matte Effect
It's incredibly easy to add a matte affect using Curves. Here's what to do:
Create three anchor points and leave them on the diagonal line. This just stops them from moving, since we don't want that.
Now just pull up on the very bottom corner and you will see a matte effect taking shape - the further up you go the more matte your image will be.

I'm a subtle girl when it comes to matte (everything in moderation is my motto!) so if I do it it's usually just a small amount to add that slightly hazy effect, but you can add as much as you want to get your ideal amount.
Here's the before and after on this one:

There you go! A basic introduction to working with the Curves tool in Photoshop, and three different things you can do with it!
Before you do, don’t forget to download my FREE Photoshop Starter Kit, as t’s got a little bit of everything to get you going with the program, including guides to layers, levels, saving, plus a little clutch of actions (including my perfect for online sharpen and resize action)