How Do I Get Started Shooting in Manual Mode?
So, you’ve been hearing a lot about shooting in manual mode, and thinking to yourself “Hmmm, I’d to try manual mode, but i’m still on AUTO, what do I need to do to help me make the switch?”
Well, wonder no more, because that’s where this blog post comes in.
I’m going to break down the steps you should take, and the things you need to understand before moving on to the next step , so that moving to Manual Mode is a smooth transition. Think of it as your own little roadmap for switching to manual mode 😀
You see, it’s not as simple as turning the dial on your camera to the big “M”, which is where a LOT of people fall down.
So, are you ready? Let’s dig in.
Step One: Learn about the exposure triangle
The very first step in learning manual mode is to learn about the Exposure Triangle.
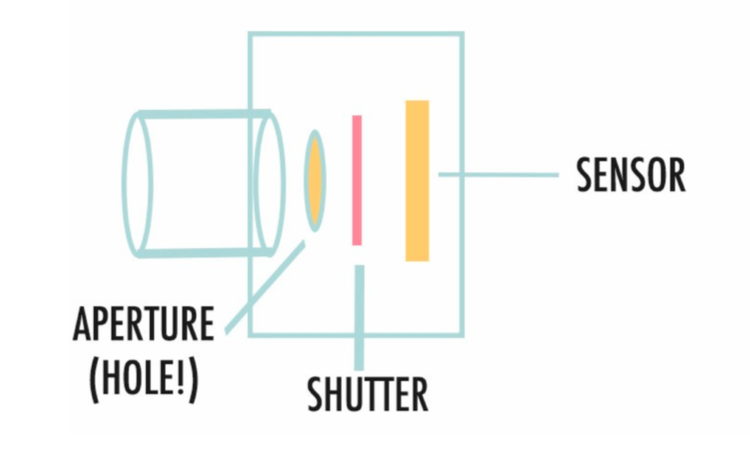
The Exposure Triangle is essentially how the three elements of exposure - Aperture, Shutter Speed and ISO - work together to control exposure. Each of these individual elements controls how much light enters the camera and is therefore recorded.
I won't go into much more detail here, but only because I wrote a full blog post about it!
Check out Your Guide to the Exposure Triangle if you need to learn about this, or just want a quick refresher, before moving onto step two:
Step Two: Learn about Aperture, Shutter Speed and ISO
Once you have a basic understanding about how these three elements work TOGETHER to control exposure, it's then time to move onto getting more in depth about how each of these affect how your image LOOKS.
Aperture controls depth of field, which is how much, or how little, of the scene will be in focus. (This is where you can get those yummy blurred backgrounds!)
What I want you to know right now is that aperture is probably the hardest of the three elements to get your head around, which is why I have not one, not two, but THREE individual lectures associated with it in my course Auto to Awesome (and three exercises to help you put it into practice) So if you feel like this takes a while to sink in, don’t worry, it’s not YOU, we have all been there!
You can get started on Aperture by reading a super quick guide to Aperture right here.
Next up is shutter speed. This controls how motion is captured - in other words, whether you allow for "motion blur" to show the movement, or freeze it.
ISO controls your camera sensitivity to light, but it can also have a rather unwelcome effect of adding noise or grain (Those little speckly bits all over your image) Personally I don't mind a bit of noise, especially on some lifestyle / documentary images, but on some images, like portrait images, I want to them to be sharp and clear. So it's another important element to consider when considering which each ones does.
Step Three: Shoot in AV mode first, and let the camera choose the other settings.
Whilst you are getting your head around the three different elements of exposure, you should start to move away from full AUTO and move onto one of the semi automatic modes instead - this will allow you to practise and get to grips with all three, as you can start to see the effect changing each element has on your image.
I recommend using Aperture Priority Mode to begin with (You’ll see this on your camera dial as AV mode if you use Canon, or just A if you use NIkon) However, if you prefer you could absolutely use Shutter Priority Mode instead.
These semi automatic modes allow you to choose your most important setting, and the camera balances the other two settings for you to get the correct exposure. Not only will this help you see which each element does, it will allow you get more creative with your images, but still with that safety net of the camera balancing the final exposure for you.
If you want to get some idea of the settings you should be using, you’ll want to download this free manual mode cheat sheet I have for you! Just go here to grab it.
As a side note, in addition to helping you get better exposure, using one of the semi-automatic modes will also allow you to do some other cool things, like setting your focus point, and turning off your flash.
Step Four: Go to full manual mode
Once you feel a bit more comfortable with all the different elements that come together to get exposure, and you understand which setting to use when, it's time to move away from AV mode and shoot in full manual mode.
This is when you control ALL THREE elements of the exposure triangle - aperture, ISO and shutter speed - all by yourself!
Yikes 😱😱😱
Now, I totally understand that if at this point, you want to just stick with using AV mode, because you think it will be easier, and there is probably is not much point in taking that final step into Manual Mode…..right?
But please, please, please trust me when I tell you that shooting in full manual mode will make so much difference to your images. That is truly when everything starts to click, and you begin to get the photos you dream of.
Don’t believe me? This is note from one of my Auto to Awesome students about making the switch:
Want a little bit more convincing? Then head over here and read about these main 3 reasons why you should shoot in manual mode instead of AV mode and it will hopefully that will knock you off AV mode for life :-)
Step Five: Practise
And that’s it! All that is left now is to practise!
You wouldn’t expect to pick up a violin and instantly become proficient and playing for the national orchestra - you need to practise, practise, practise, and then practise some more, and everything starts to feel a little easier each time you do it as you build in “muscle memory”.
This is also a great time to start playing with different types of light (which now becomes so much easier when you truly understand manual mode and how to get the correct exposure for the scene) changing your settings for correct focus (ditto!) and using different composition tools.
Alright my friends, we are done! I hope that this post helped you realise just what you need to focus on next in your journey to shooting in full manual mode, and how to enjoy getting there!


