Beginner Photography Tips: Understanding Aperture
Understanding aperture and what it does is extremely important in photography, as it will help you understand how to balance your exposure when shooting in manual mode, and also how to control the look and feel of your images by controlling your depth of field. It can also be one of the hardest aspects of photography to get your head around! So, in today's post, I’m going to look at what aperture is, and how you can use it to get more creative with your photography, all in my usual down to earth style :)
Ready? Let's go!
What is Aperture?
Aperture is essentially a small opening in your lens that lets light into your camera’s sensor. By changing the aperture you are controlling how wide or small that opening is, and therefore how much light is let into the camera. The size of the opening is measured in F-stops - the smaller the opening, the larger the F-stop number. So, a small number like F2.8 is a large opening, and F16 is a small opening. (it seems like it should be the other way round I know!) Basically, the smaller the number, the larger the aperture.
Here is a diagram of what your aperture looks like, and how it changes size as we move through the F stops.
What's important here is to note that the larger opening allows more light into the camera, whilst the smaller opening stops light from getting in! So if you are in a dark room, you need to let as much light into the camera as possible so you want a wide aperture. On a very bright day, you might want to close up your aperture to stop as much light getting in.
However, aperture does much more than simply control how much light gets in - it changes how your images look too, by controlling depth of field. This is the good stuff since it lets us take control to get our images to look the way we want them to, and get that scrummy blurred background.
If you want some suggested numbers to use, download my manual settings cheat sheet, which has it all laid out for you:
What is depth of field?
Depth of field is simply how much of the scene is in sharp focus. For example, in a landscape photo, you want as much of the photo to be in sharp focus as possible so you would want a wide depth of field (larger area in focus). However, when taking a portrait photo, or some other situation where you want the main subject to stand out, you will probably want the background to be blurred but your subject in sharp focus. (This blur is often referred to as "bokeh", which means "blur" or "haze") In this case, you want a shallow depth of field (smaller area in focus)
This knowledge of depth of field allows us to get creative with our images, by allowing us to make some parts in sharp focus, and others soft and blurred.
Here's an example of how different F numbers affect the look of the image. My lovely obliging model Winnie the Pooh is in the same place for all three, and so am I. He is always in focus, it’s the difference to the background you should be looking at - especially where you can start to see the blur.
F1.8
F3.2
F5.6
F14
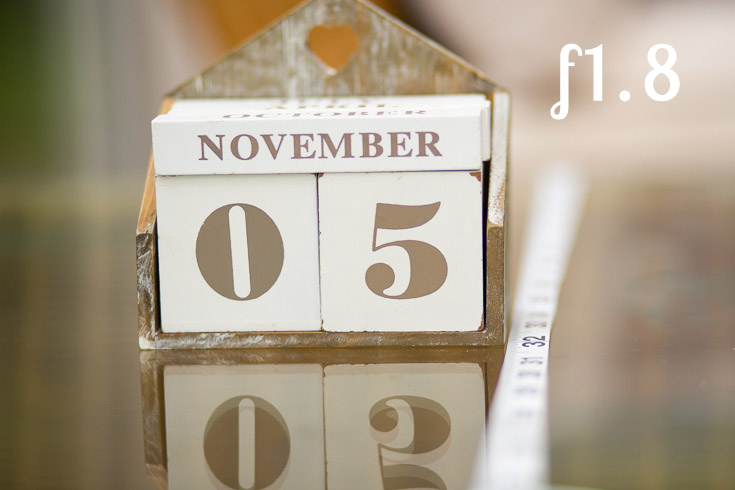
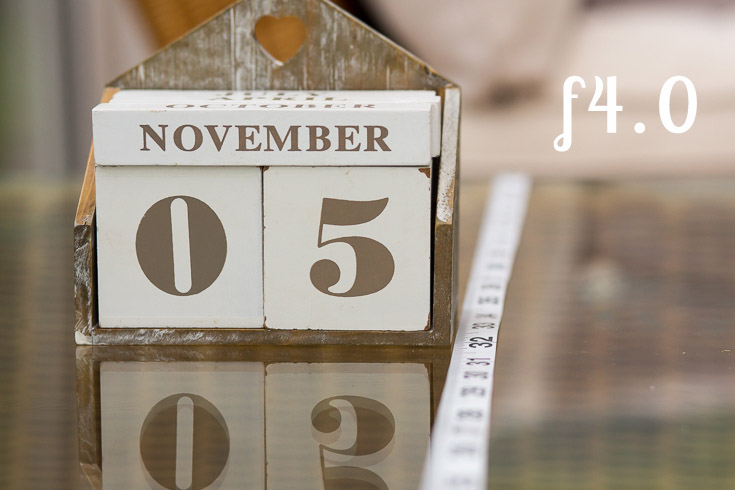
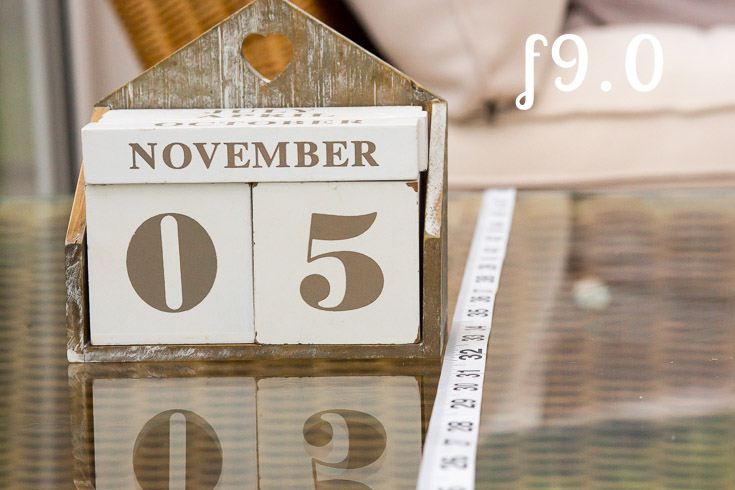
More examples - in this set I'm focusing on the dates blocks, but look at the tape measure. You can see at F1.8 only the number right next to where I am focusing (32) is in focus, everything else is blurred and soft. As I progress through the aperture range, more and more numbers become sharp and in focus, and the blur is only on the edges. This is depth of field!
If depth of field is all new to you, can I also suggest reading this article on how to use a depth of field calculator - you pop in some details like your camera model, lens, distance from subject and the aperture you are using, and it will show you how much of an area will be in focus. I found that very useful when I was starting out, just getting my head around how different things affected the final image.
Of course Aperture is just one element of the exposure triangle, but it's a big one, which is why we have four whole lectures to devoted to it over at Auto to Awesome so don't worry if it takes a little while to sink in!


