Why you need to stop using ALL the AUTO functions of your camera
When we think about AUTO mode in our cameras, we usually just think about the mode that allows us to balance our exposure, since, well, it’s the one called AUTO :-)
But your camera has lots of automatic functions that you’ll want to move away from, so in this week’s blog post, we’re talking through what they are, and most importantly, why you want to stop using them!
Now, don’t get me wrong, there are times and situations where you MIGHT want to use some of these automatic features - but honestly, those times are few and far between, so let’s check these out, so you know what to stop doing….
Now, before we dive in, I wanted to let you know about an extra special freebie I’ve created just for you! It’s my FREE 90 Day Photography Learning Blueprint, and it’s a complete roadmap for you to follow that shows you exactly what you need learn to get great photos, and has links to further reading in each one. This little PDF is worth its weight in gold, so go grab it now (you’ll kick yourself in about a week if you don’t!)
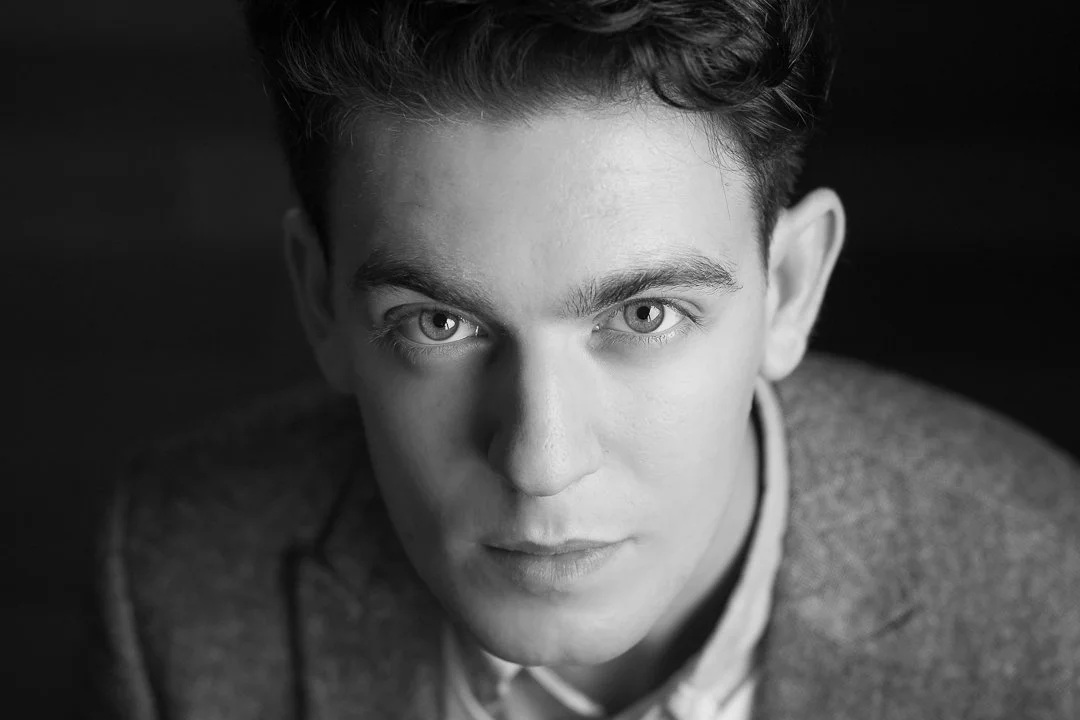
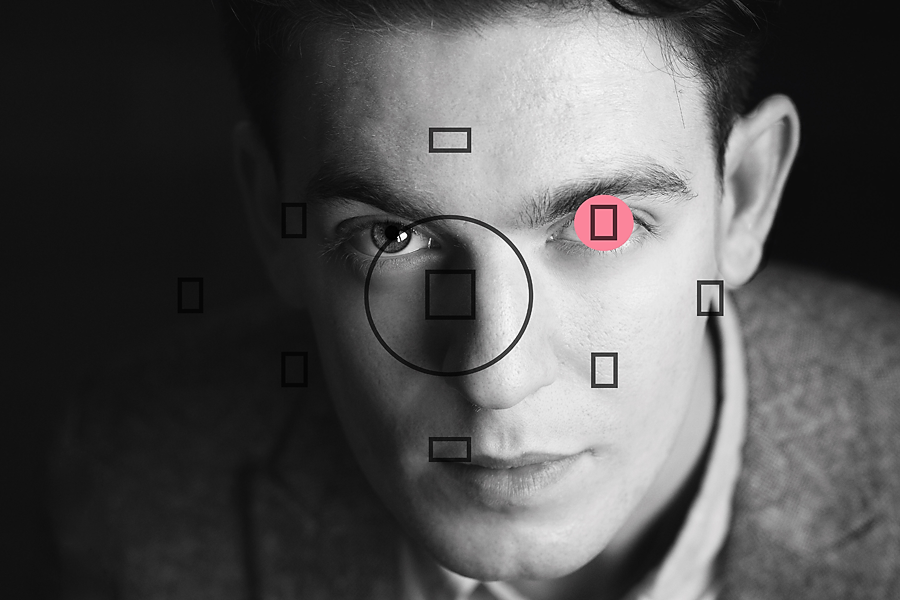
#1 - Automatic Focus Point Selection
Auto Focus Point Selection is when you allow the camera to choose the Auto focus point for you, rather than selecting the right one yourself (which you probably think is quicker and easier!)
But here’s WHY we want to move away from this automatic feature…
Whenever the camera is left to determine the focus point, it will pick whatever happens to be closest to the camera to focus on. This might end up being the nose or a hat, rather than the eyes in a portrait, or other times, it might just decide it likes the look of the background better, and focus there instead of your subject! Either way, the result is an out of focus subject.
But there’s another reason :-)
Although Auto Focus requires the least input from you, it’s also the SLOWEST option because of the technology it uses.
Think about it, if you have 11 focus points, the camera needs to cycle through all of those 11 focus points to try to figure out where the subject is, and make an educated guess about which focus point it needs to use. (And imagine if you had 54!)
It does this by trying to match up what it sees through the viewfinder to through the several “reference photos” it holds in it’s internal database, trying to see what you’re photographing most closely resembles. So it ‘s having to cycle through these focus points and look at all those reference photos, before deciding which auto focus point to use.
Although it’s actually pretty fast at doing this (considering how much it has to go through) it can be FAR too slow when you need to get focus fast - for example, on a moving subject.
Don’t get me wrong, there is a LOT more goes into getting a tack sharp image than just choosing your own focus point (which is why we have a whole module devoted to it in Auto to Awesome) but choosing you own focus point is a great place to start!
#2 - Auto White Balance
Auto White Balance is when your camera tries to guess at the colour temperature of the light you’re using to take a photograph.
(Not sure what white balance is? Here’s the cliff notes version: All light has a color, but your eyes are able to adjust to these changes in color temperature, so that you hardly notice it with the naked eye. Your camera can’t do this in the same way, which is why your image will sometimes look too yellow or too blue! You set a white balance in order to tell the camera what the color “temperature” is, so that your photos have colour that is true to life, and where white looks white!)
The problem with using Auto White Balance to do this is that it can be hit or miss. Sometimes it gets it spot on, sometimes it’s a little out, sometimes it will make your daughter look like a Smurf :-)
It can also change on a whim, so if you are taking a number of photos in a session - let’s say a portrait session - you’ll usually get differing white balance results from the same scene, even for photos that were taken just seconds after the other.
In order to make sure that your images not only have the correct colour, but have the correct colour consistently, you’ll want to do this yourself, rather than relying on the camera.

Please note, if you shoot in RAW, you can absolutely change your white balance later in processing.
But because white balance and exposure are linked, it’s a much, much better idea to get this right in camera so you don’t end up with big exposure shifts. Plus, it’s notoriously difficult to tell the correct colour by eye (most new photographers will have their images too cool if they tried to guess the white balance) so setting it in camera takes away all that guesswork!
#3 - Auto (or Semi Auto Exposure) Modes
I’ve saved the best ‘till last :-)
I simply can’t think of a time when I would recommend that you use your camera in full AUTO exposure mode - unless you’re planning on handing your DSLR to someone inexperienced and know they can’t handle anything else!
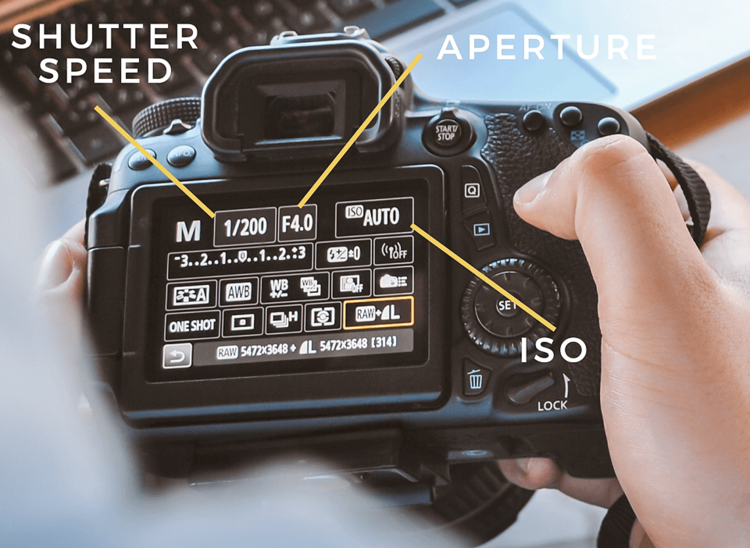
AUTO mode is when your camera chooses all three elements of exposure for you - Aperture, Shutter Speed and ISO. The problem with this is that all of these elements determine how bright or dark your image is, and also how your image looks.
Aperture determines how much of the scene will be in focus, shutter speed how motion is captured, and ISO how sensitive your camera is to the light that the aperture and shutter let reach the sensor, which effects the color and clarity of your image.
Using AUTO mode is like rolling a dice every time you press the shutter, as all three of these variables can change between each shot.
So what about the semi-automatic modes I hear you ask?
Although undoubtedly much better, it’s actually the same in any of the semi-automatic modes (for example, Aperture Priority Mode) Although you do gain more control over how your image looks, you’re still leaving a whole lot of decisions to a bunch of wires and sensors!
I speak to a lot of people who have been learning photography for a while but still not getting the images they want - and the reason is usually that’ve never made the leap from Aperture Priority Mode to full manual mode.
Manual Mode is when you take full control over all three elements of exposure, so that you can get the image to look EXACTLY the way that you want it to, get consistency with your exposures, work in tricky light, and get more dramatic images.
So, yes absolutely, there are times when you might want to fall back on one of the Aperture Priority Modes even after you’ve learnt manual mode, but the key thing to note here is that by learning manual mode, you’ll know how your camera is going to react in different situations, and which one mode suits what you’re shooting best!
In my program Auto to Awesome, we start right at the beginning, and teach you all about the elements of exposure, and shooting in manual mode (and about how to use all different lighting situations!) so that know exactly what settings to use when.
So are there more automatic functions? You betcha! But these are the big three that you’re going to want to stay away from if you want to start to get great photos, so get moving away from those AUTO modes to get better photos today?
Don’t forget to download your FREE 90 Day Photography Learning Blueprint before you go too: there is so much goodness in this little PDF that you’ll definitely want this with you on your photography journey. Grab it here:
As always, if you have a Q, you can leave it below!