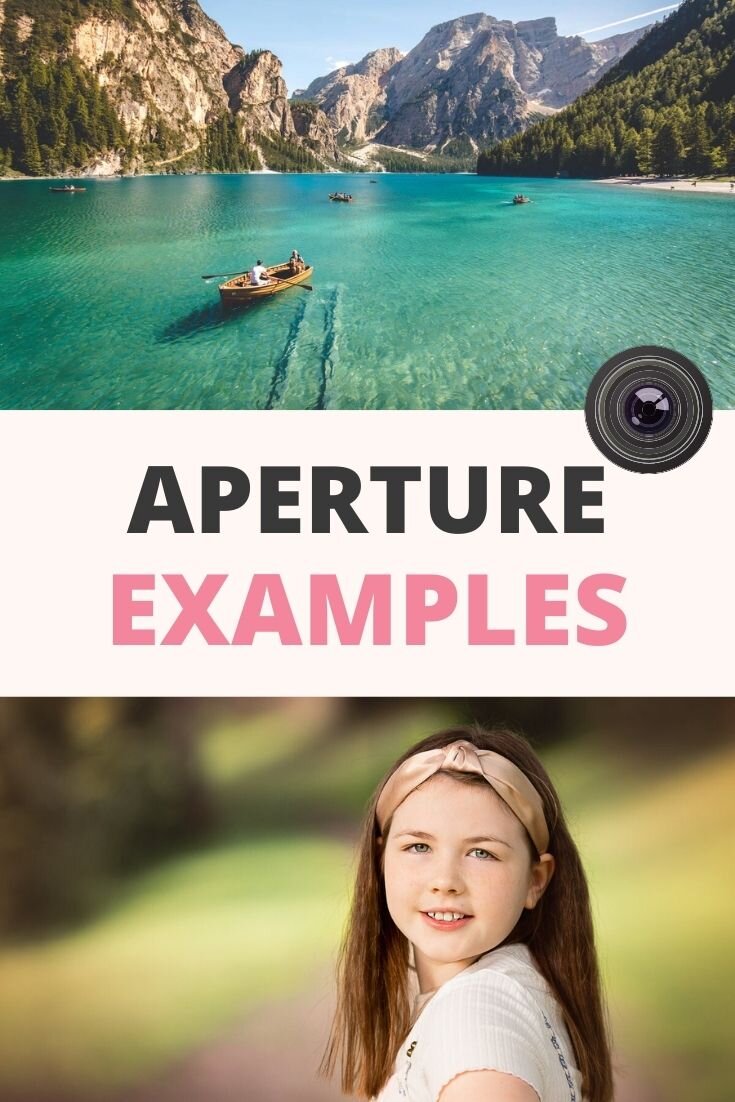
Aperture Examples: How to Use Aperture in Photography For Different Looks
This week, I’m going to share some aperture examples with you, so you can see exactly how you can use your aperture in photography to create different “looks” in your photos.
Although there are three different elements that control exposure (aperture, shutter speed and ISO) aperture is a big one to master, simply because it gives you so much creative control!
You can completely change the look of your image just by the aperture you choose, which is why it’s important to understand what it is, what it does, and how you can control it.
But as I deeply believe that we learn best by first understanding a concept,and then putting it into action (and practising it, in different scenarios, until we know it inside out) today, I’m going to give you some aperture example images for inspiration, so that by the end of the blog post, you’ll be itching to pick up your camera and practise using different apertures!
Prefer to watch? Then here’s the video for ya:

Rather read about it? Then scroll on down for the info we go over in the video!
What is Aperture?
So, let’s start with a super quick recap on what aperture is, and how in controls depth of field.
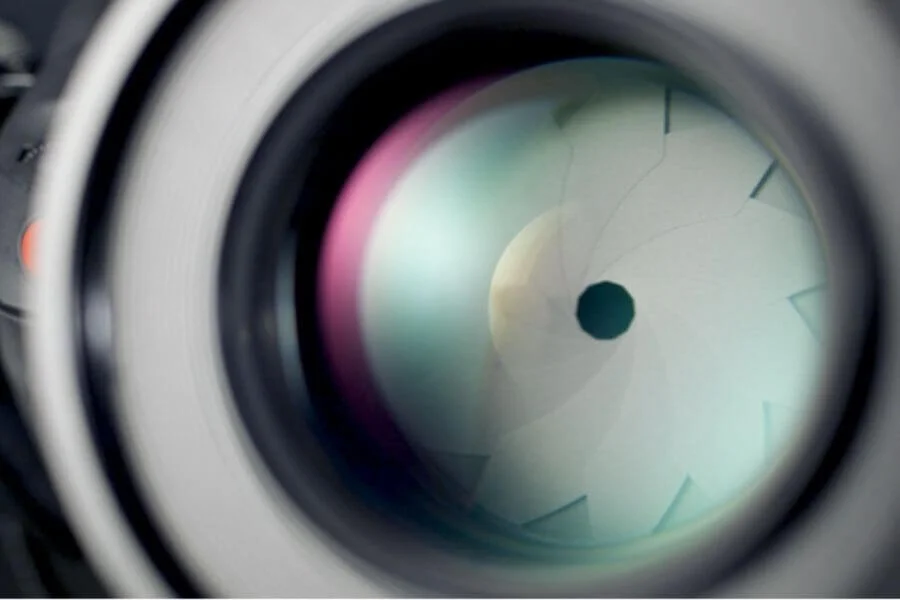
Aperture is simply the term used to describe a hole in your lens. You can actually see the hole in the image below, along with the “blades” that move in and out to make the hole bigger or smaller.
That hole lets light into the camera so that it can reach the sensor to take an image. A large aperture (think big hole) let’s lots of light in, whereas a small aperture (small hole!!) doesn’t let a lot of light in.
We choose a F number for to control our aperture, and you’ll see it on your camera as something like F2.8, F5.6 or F16.
The smaller the F number, the bigger the aperture, and also the smallest area in focus. (that can be a bit of a mind 🤯 if you’re just newly discovering aperture, but don’t worry, it will become second nature to you soon, and you won’t even have to think about it!)
That’s the basics, and that’s important to know from an exposure perspective.
But the F number you choose also determines depth of field. Again, that’s just a fancy term for how much of the scene is in focus. A large depth of field gives you a large area in focus, and a small one gives you a small area in focus.
So when we choose a F number for a scene, we are thinking both about how much light we want to reach the sensor, AND how much of the scene we’d like to be in focus!
If right now you are still on AUTO mode, you need to stop using that, and switch to Aperture Priority Mode instead. This allows you to choose the F number yourself, but the camera will handle the exposure for you, by balancing the shutter speed and ISO for you.
If you aren’t sure about this and you’d like me to walk you through it step by step, or you just would like to get your hands on a guide with all the important info in it, I have a free resource for you; my Aperture Priority Mode Cheat Sheet. It has more information on everything we just spoke about, so I’m going to point you to that resource for more info. It’s free and really, really good so Just go here to download it.
Time for some examples!!
OK, so that was a very brief introduction to a big subject (just to give you an idea we have THREE lessons just on aperture in my Exposure Essentials course, because there are SO many different factors that affect it!) but that’s because I want to move onto the whole point of this post, which was to give you some aperture example photos.
That way you can see the difference the F number you choose can make to your photo, so you can start to think about how and when you can use it creatively.
Wide Aperture Examples
Let’s look at the times we might use a wide aperture, such as F1.4 - F4.0.
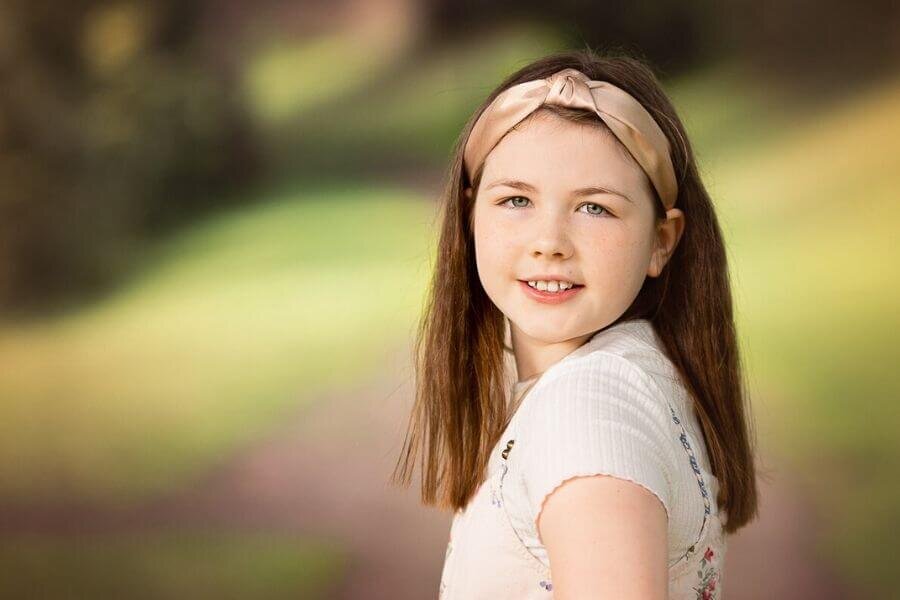
Portraits are a classic example of this, because we can get that yummy dreamy background blur which helps bring attention squarely to our subject - the person. You can see an example of this below.
This particular image was shot at F2.8, and you can see that the background is super blurry, but my subject is in tack sharp focus, so she seems to ‘pop” off the background.
(I have a step by step guide for getting background blur in that free resource I mentioned btw!)
Another example of a time you might have a smaller area in focus is in lifestyle situations, when you need to blur out a messy background.
I’m often capturing my son in our day to day lives (although not so much at the moment, he’s on camera strike) and I’ll be honest, my house isn’t the most tidy of specimens.
Blurring out the background by using a smaller F number helps bring that mess blissfully under control, so that it’s not the first thing you see in the photo!
In this example below, I’m using F3.2, and although there is still a lot going on in the frame, and several distracting elements, the aperture helps blur all that clutter out of the way without my having to lift a finger.
So if you are somewhere with a messy background or distracting elements, you can apply a small f stop to blur it out, so that focus is brought to your subject. (If you can remove the distracting elements, even better, but sometimes it’s just not feasible, especially when shooting unplanned shots)

Another wide aperture example is when you’d like to create little circles of light in the background, often called light bokeh.
You get this effect by having some points of light in the background (fairy lights on a christmas tree is one example) and then using a smaller F number. This blurs of the points of light to create circles!
Just a fun little trick to add a bit of extra interest to an image.

FINALLY, another time I might use a larger aperture is when I am photographing indoors, or in a low light situation.
That’s because I need to get MORE light on my subject, and opening up your aperture is one way of doing it!
In REALLY low light situations, I might find myself shooting wide open, just to get that amount of light in.
Mid-Range Aperture Examples
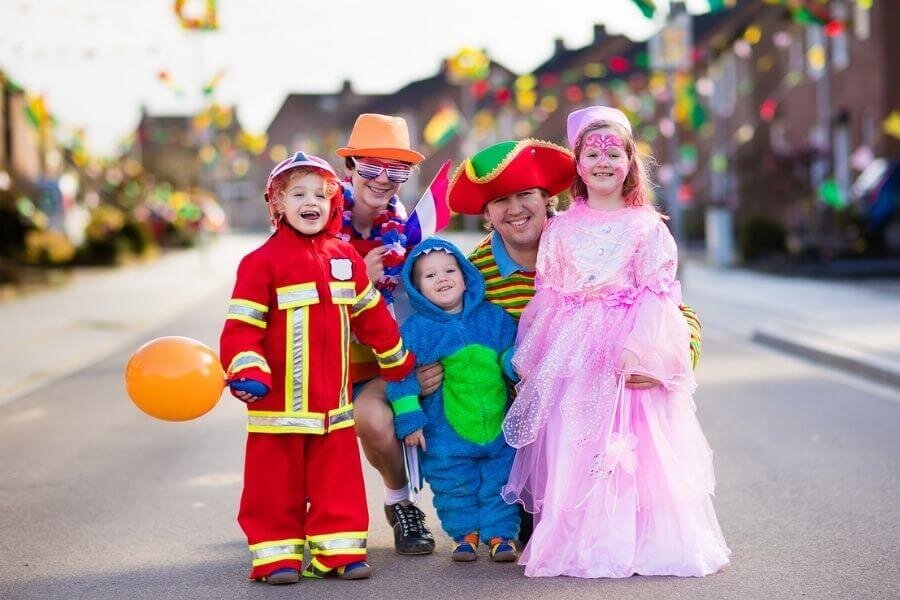
Let’s move on now to an example of when we could use a more middle ground setting, such as F5.6 - F11.
Generally speaking, the only time I find myself using this kind of F numbers is when I’m photographing a larger group of people, or a family, because I need more of the scene to be in focus because there’s more in there!
(Want to learn more about the best aperture for photographing families? Check out the video I did on Camera Settings for Family Photos over on YouTube!)
That’s because sometimes, using these kind of F numbers (without a clear reason for doing so!) tends to give your image a “snapshotty” look to them, because this is exactly the kind of apertures you’ll get on AUTO.
That’s because your camera - expensive though it is - can’t see, so it doesn’t have frickin’ clue whether you are taking a portrait shot or a landscape one. In the absence of any having idea what’s in front of it, it goes for “middle of the road” settings, like F8.
And what does middle of the road settings give you? Middle of the road photos!
Now, that’s not to say that you will never use these kind of numbers, or if you do your photos won’t look good, because there will ALWAYS be times when a general rule doesn’t fit. (And that’s why it’s important to truly learn about aperture, not just read random blog posts on it!)
For example, you may find yourself needing to use F5.6 for a single portrait, or F11 for a macro shot, so as with everything in photography, you need to first understand how depth of field works inside out, and how you can get the scene to look the way you want it to.
Small Aperture Examples
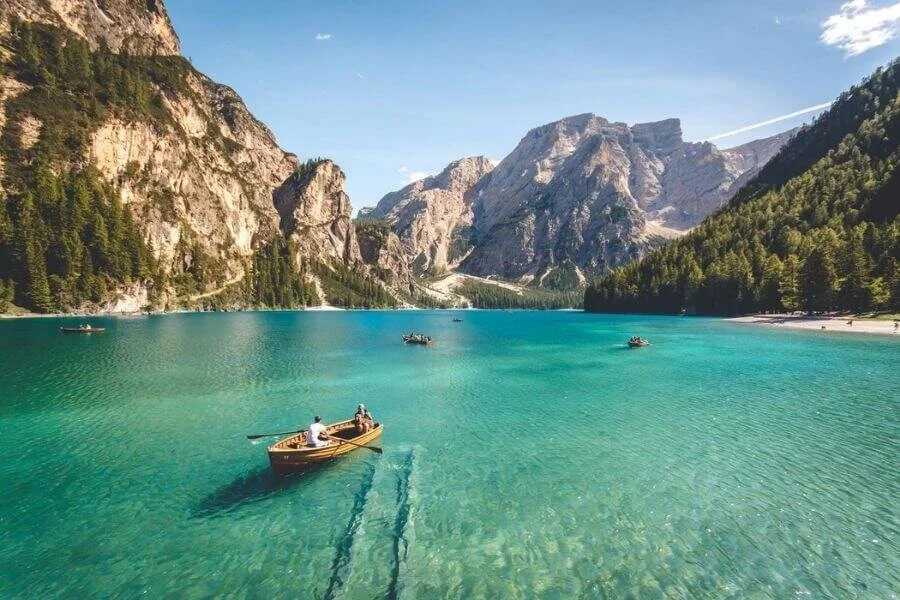
Let’s scoot on over to the final “range”, this time somewhere around F13 - F22, and look at example images taken with these smaller f numbers, in order to get more of the area in focus.
The most likely reason to desire a wide depth of field is when you are shooting landscapes, because that’s a situation where you often need everything from near to far to be sharp, like in the example below.
But of course, there are other times as well - portraits with a wide depth of field can also look fantastic, so remember, no rules, just guides :)
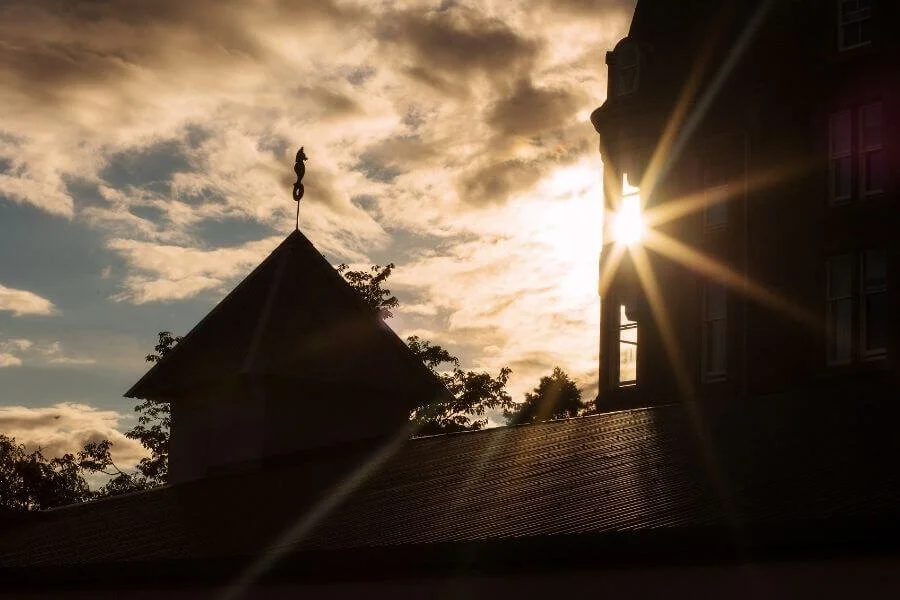
Another time to bring out the large F number is to get sun or star bursts in your image. This is when you can take any points of light in an image, and instead of making them into circles like we did earlier, make them into ‘stars’, like in the image below.
You can do this with any light sources, but one we will always have available is the sun. Point the camera in the direction of the sun with a large F number chosen, and you’ll get a starburst effect.
BIG HUGE IMPORTANT CAVEAT: do NOT look directly at the sun through your viewfinder, or you will damage your eyes. And no photo is worth that, so just don’t do it. Seriously.
There you have it: some aperture examples for you to consider, and hopefully even try out for yourself!
So now it’s your turn. Grab your camera, and if you aren’t doing this already, turn that dial to A or Av, and start practising!
Be sure to download the free resource “Aperture Priority Mode Cheat Sheet” that goes along with this post - it’s packed with info along with a step by step guide, so go grab it while you can - and check an example in this post for inspiration!
As always, if you enjoyed this post, please share it! It helps keeps small one-woman blogs like mine alive, and allows me to buy bribes for my son so I can take his photo 😉 Simply pin in to your Pinterest boards, share on Facebook or Twitter, or mention Live Snap Love on Instagram!
Now off you go and practice and I’ll see you again next week xx
Want more? Check these out!
Example Photos with Camera Settings
The Exposure Triangle in Photography