
5 Tips for Creating a Photo Storyboard or Collage
Although one photo can speak a thousand words, sometimes a few more can tell it better!
A photo storyboard or collage is a fantastic way to display multiple images of similar photos, or even tell a story through your images. Here are some tips for making yours look as good as possible, along with links to some free collage and storyboard templates, and even how to make your own if you are feeling inspired!

Storyboards can work well with both lifestyle and more formally posed portraits, and I love them for times when I ether can't pick just one image or when having a series of them together just simply makes them all stronger.
Here's some tips for making them work.
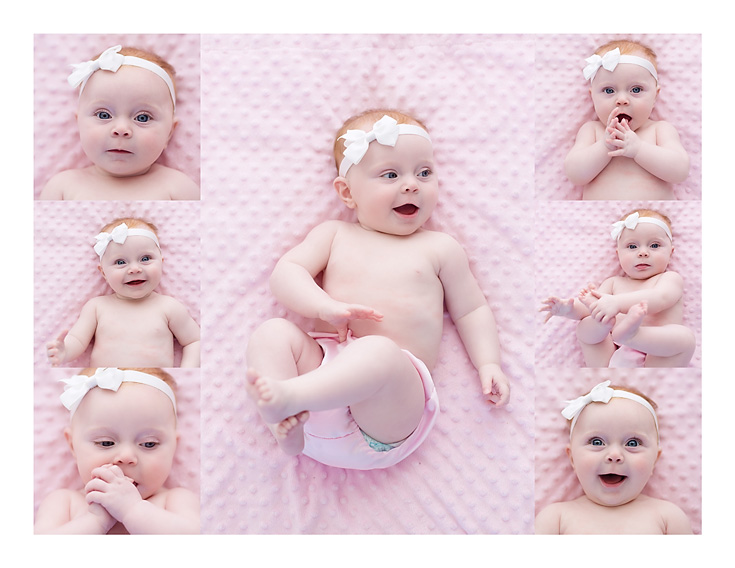
1) Select A Good Mix of Pictures
When displaying portrait images in a collage or storyboard, select a good mix of pictures - include full body shots, medium close ups, and full close ups so you get the full range.
For lifestyle images, the process is the same - choose images that show more of the environment, the subject, the activity and the close-up details, In lifestyle, try to make sure that the images selected tell the story completely, and that you haven't missed out an important part which ties everything together.
2) Or Showcase Similar Images
Alternatively a group of the same type of images also works well - for example a series of close up images that showcase different expressions, or sequence images such as jumping or dancing.
Another option is when you showcase a photo a month of your baby, or a photograph taken each year on your child's birthday for example. The trick to making these look cohesive is to make sure that the subject takes up an equal amount of the frame in each one so that it looks planned and "together"
3) Make Sure You Don't Cut Anything Off!
When choosing your images, consider whether any part of the image will be cut off when it is applied to the storyboard or collage. (Many have square openings which will of course cut off a sizeable chunk of your image) Also think about how many portrait and landscape orientation sized frames there are in the collage, and choose accordingly.
4) Find More Pictures Than You Need!
Try to find more pictures that you have "openings" in your collage or storyboard - it's much easier to have more choices than less! I always find halfway through making one that a certain picture just doesn't fit into my collage frame, or just doesn't look as good as I thought it would, so the more options you have the better!
5) Choose Complementary Colors
Think about how the images are going to look together, and make sure the colours complement one another. For example, images that were edited in the same way will give you a cohesive look (so consider running the same action, or converting to black and white to give you that same look and feel) but you can also simply choose images that have similar colours, which will help give you a harmonious look. If you want something bolder, choose images with opposite colours, that will give it more energy and look more dynamic. Regardless of which method you choose, makes sure the tones all "work" together.

Now it's just a case of dropping them into your collage! It might take a few goes until you get the right mix of pictures (this is why you choose too many to start with!)
If you are unsure how to do this, then I have a step by step tutorial on how to add images to a photoshop template here on the blog (which also has a video) that will teach you, but it's incredibly simple once you get the hang of it.
If you feel inspired to make a storyboard or collage of your image, then you can find links to over 100 Free Photoshop and Storyboard Templates here.