
5 Tips for Low Light Photography
As winter draws in, I often find myself shooting when there is low, or limited light.
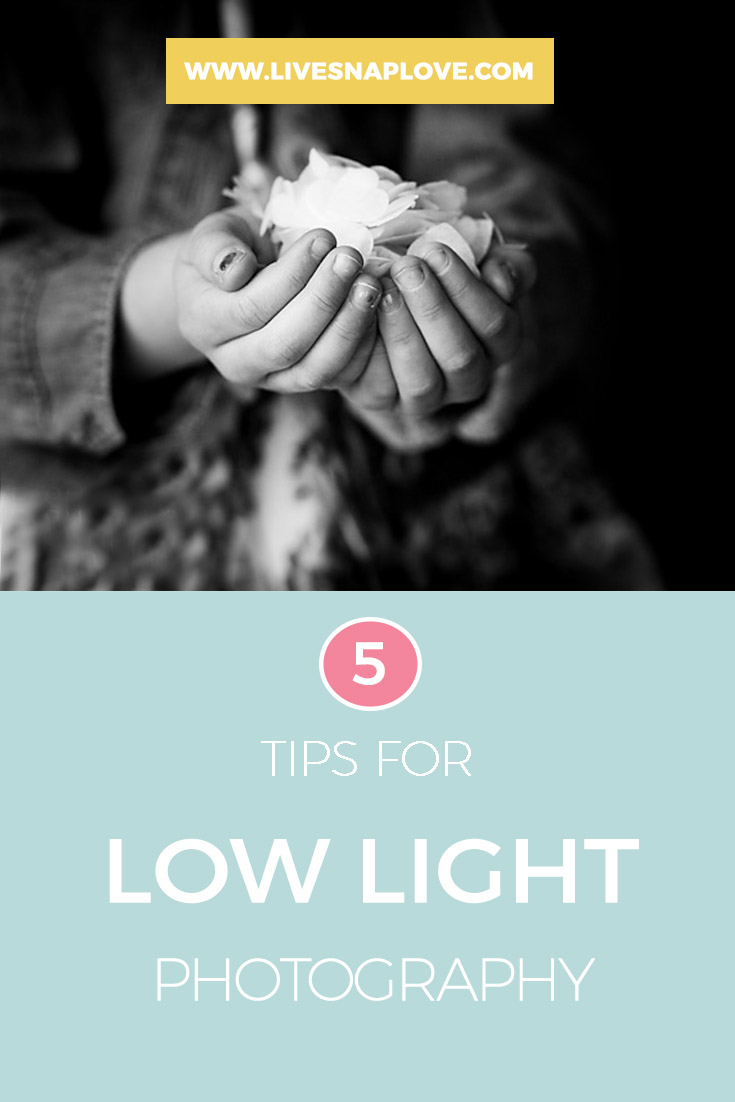
After shooting through the summer when light is abundant, I personally love the opportunity to shoot images that are taken with very little light, particularly when I convert these to black and white - there's something about low light and monochrome together that tugs at me, which is why you will find all of the examples in this post converted to black and white!
But, hey, you can leave them in colour too :)
OK, let's get cracking' with those low light photography tips shall we?
1) Put your Subject in a Pocket of Light
In every single photograph you take, you need light to hit the sensor to make an image - there doesn't need to be lots of light, but you do need to have light on your subject. Move them into a pocket of light - next to a lamp, ,light from an open door, or under a streetlight - so that your subject is illuminated.

2) Maximise the Light Hitting the Sensor.
In dark situations, you may struggle with getting enough light into the camera. Open up your aperture (shoot with a smaller F number) to maximise the amount of light available - this is one of those occasions when a fast lens can be invaluable!
You will probably also need to increase your ISO higher than normal, and whilst I know it can be tempting to keep a low ISO number to help reduce noise, you will find it is much better to expose correctly in camera. Also, grain can just add to the overall feel and mood of a low light image - I've even been known to add grain in on occasion!
(If you struggle to know which settings to use when, then do be sure to download my FREE manual mode cheat sheet! You’ll get suggested settings for Aperture, ISO and Shutter Speed!)

3) Reduce Shutter Speed and Steady Your Camera
You may also want to reduce your shutter speed which will again help get more light into the sensor by keeping the shutter open for longer. However, remember that even when photographing still subjects, you can still get motion blur caused by your own motion when holding the camera - as I am quite shaky I never shoot handheld below 1/60 (although some do!) and even then I need to make sure I am very steady and deliberate. If you can, you can use a tripod which will minimise camera shake.

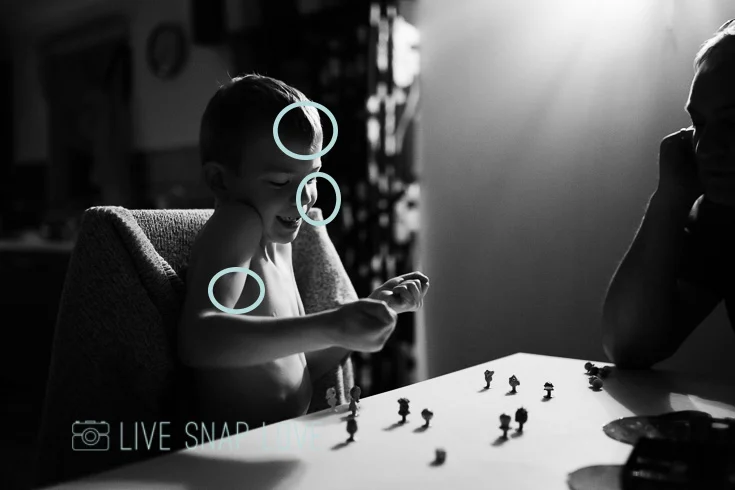
4) Focus on an area of contrast
In low light scenes, your lens will probably struggle to find focus. You can help it out enormously simply by focusing on an area of contrast - this is where the light meets the dark (I've circled some areas you could have used for focus on the image below) This is usually enough to help your camera focus, but if you are REALLY struggling then consider switching to manual focus. This is not as hard as it sounds! Simply turn the switch on your lens from AF to MF, and turn the focus ring to lock focus. This is obviously much more difficult with moving subjects than it is with stationary ones!
5) Add more Light
If you don't want a dark, moody look to an image, and you are struggling with getting enough light into the camera, then remember you can also add more light to the scene. Turn on an extra lamp, open more windows and so on, or use an external flash which will help illuminate the scene.
(We have a guide to using external flash here!)

I hope you have found these tips for photographing in low light helpful, and you will be more confident shooting even when it's dark!
Before you go, don’t forget to download your free manual mode cheat sheet here!